Materials needed
To do your very first Kniwwelino projects, you only need:
- 1 Kniwwelino
- 1 Micro USB cable
- 1 Computer

To be able to develop more complex projects, you can work with sensors and actuators like:
- An additional Kniwwelino (and Micro USB cable)
- A Powerbank
- A 3xAA or 3xAAA Battery holder
- LEDs
- External buttons
- Alligator clips in black, red and other colors
- Silicone wire in black, red and other colors (or any other wire)
- Small screws M2 or M2.5
- Tape

As soon as you understood you to use all the above can start working with:
- Potentiometer
- Temperature and humidity sensor
- Microphone
- Soil moisture sensor
- Light Sensor
- Hall effect sensor
- 3 axes Gyroscope and Axelerometer
- RGB and Gesture Sensor
- Motor
- Servo
- …
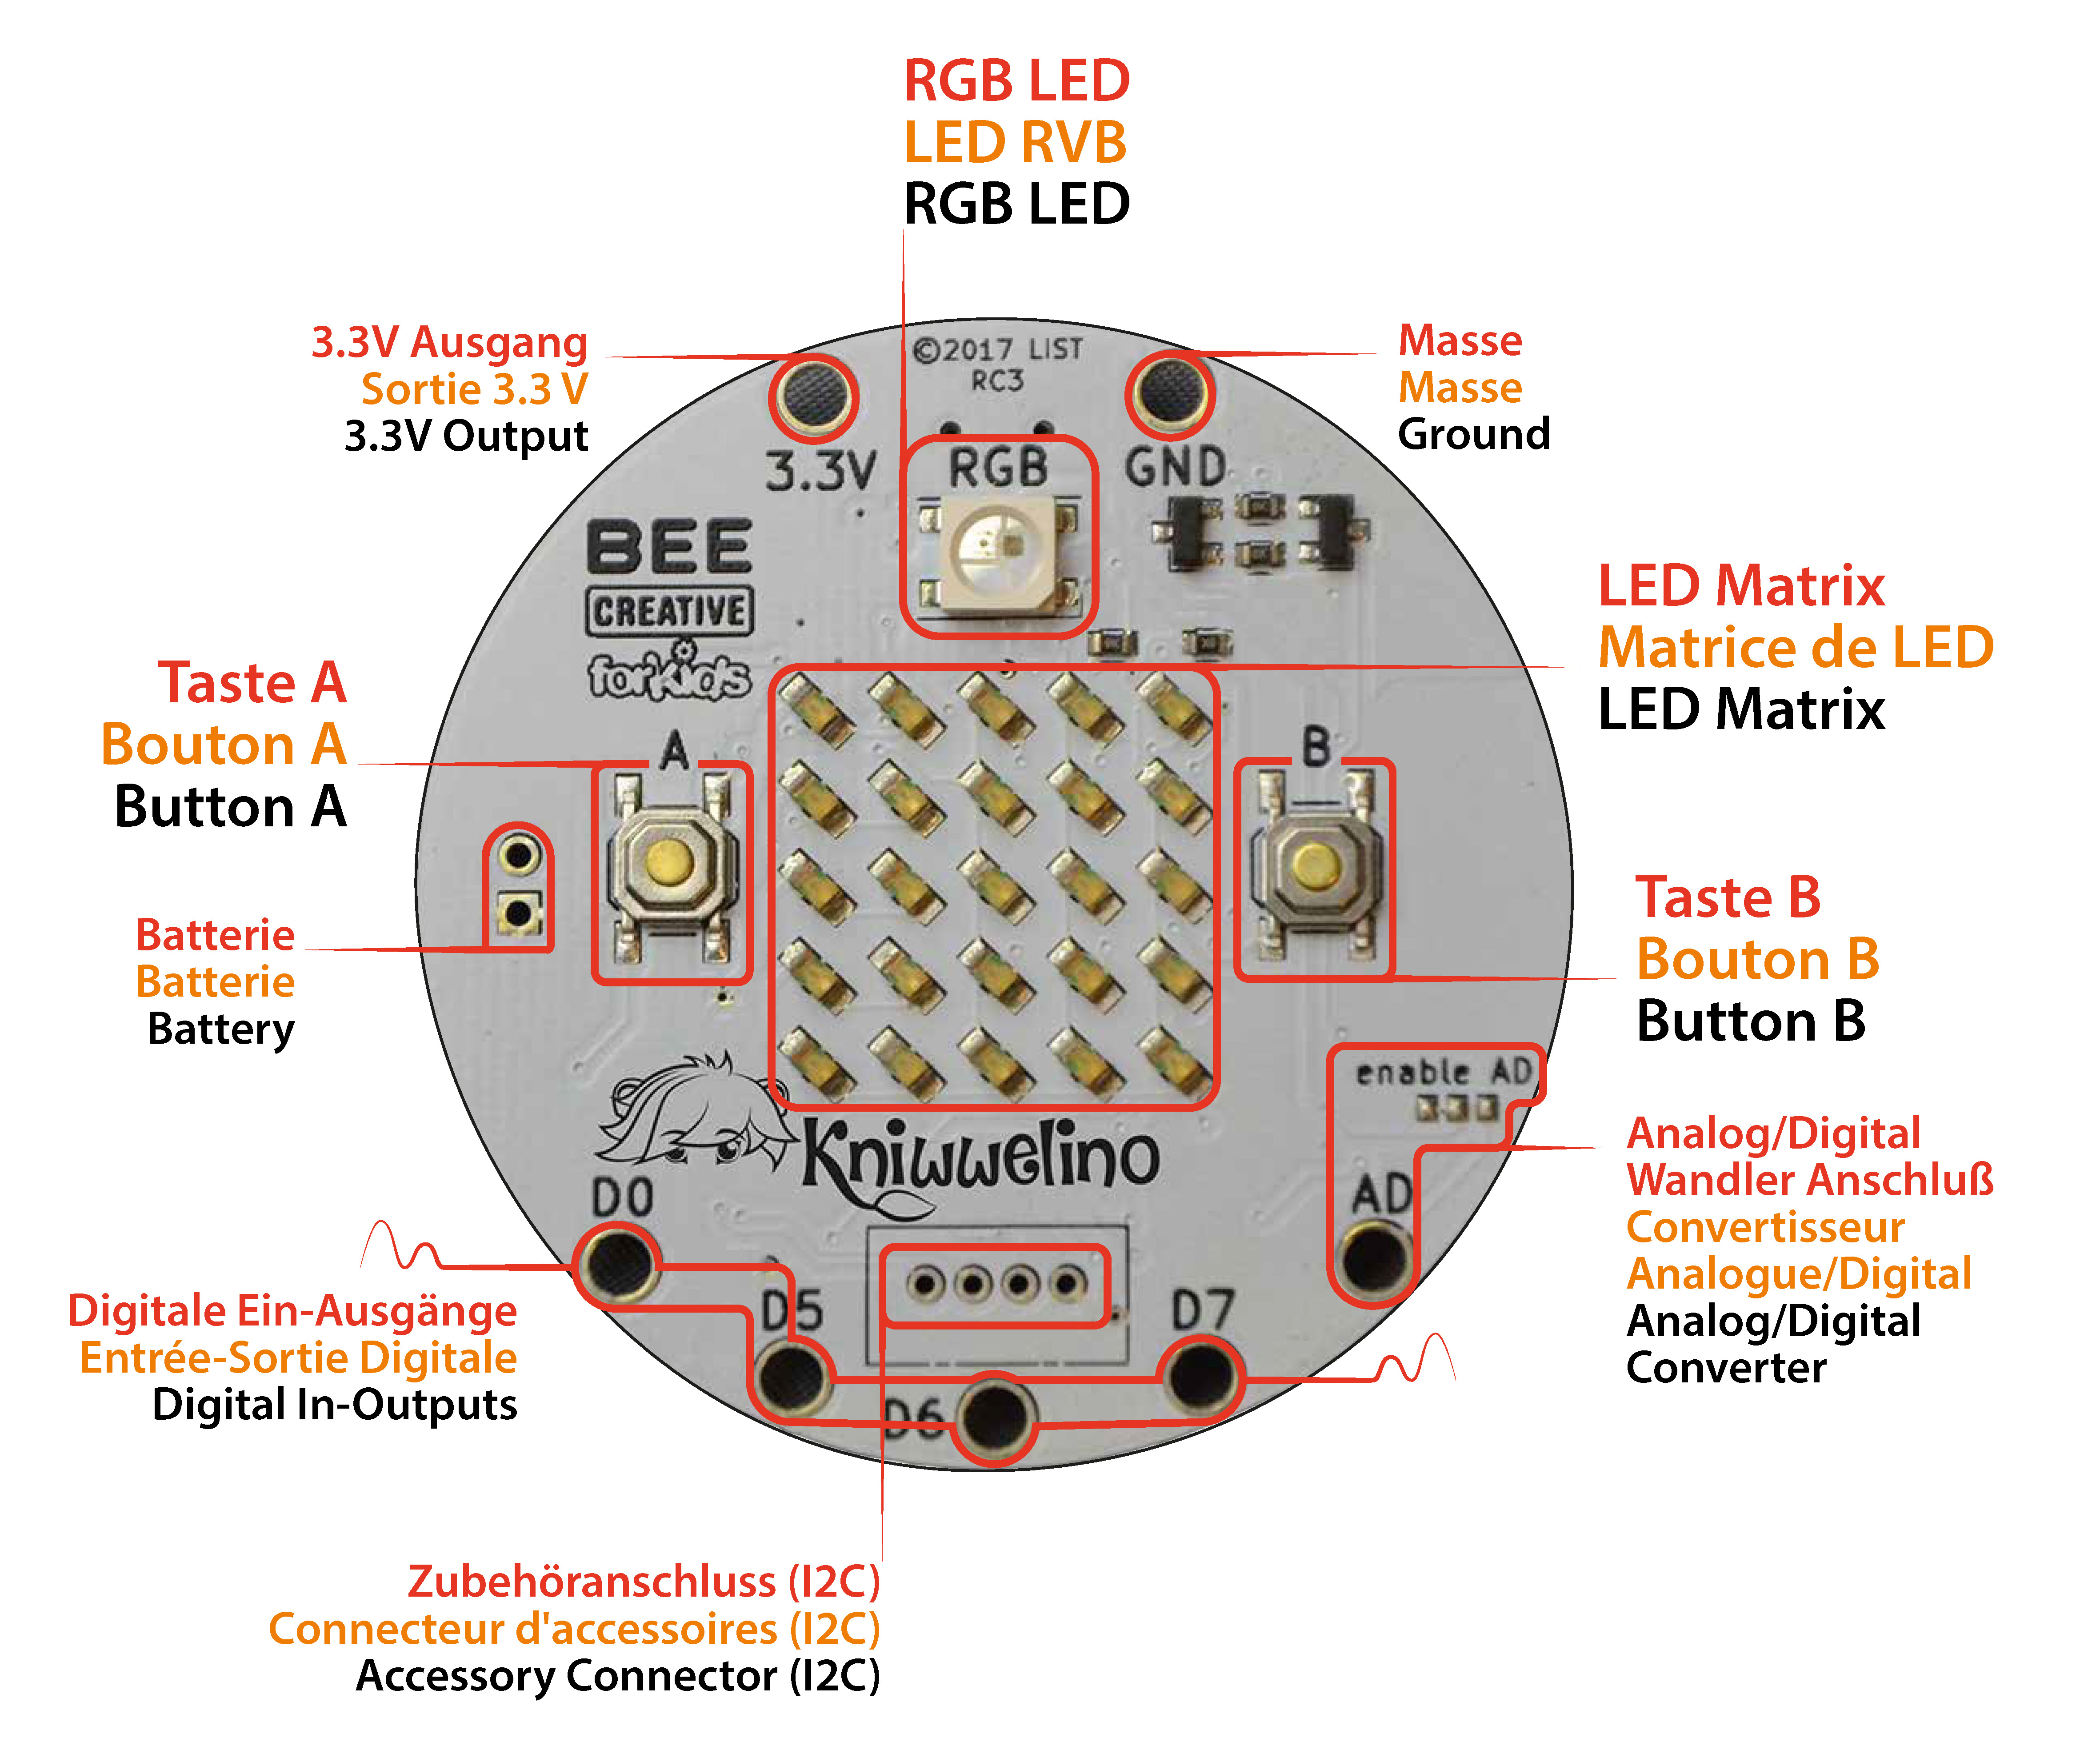
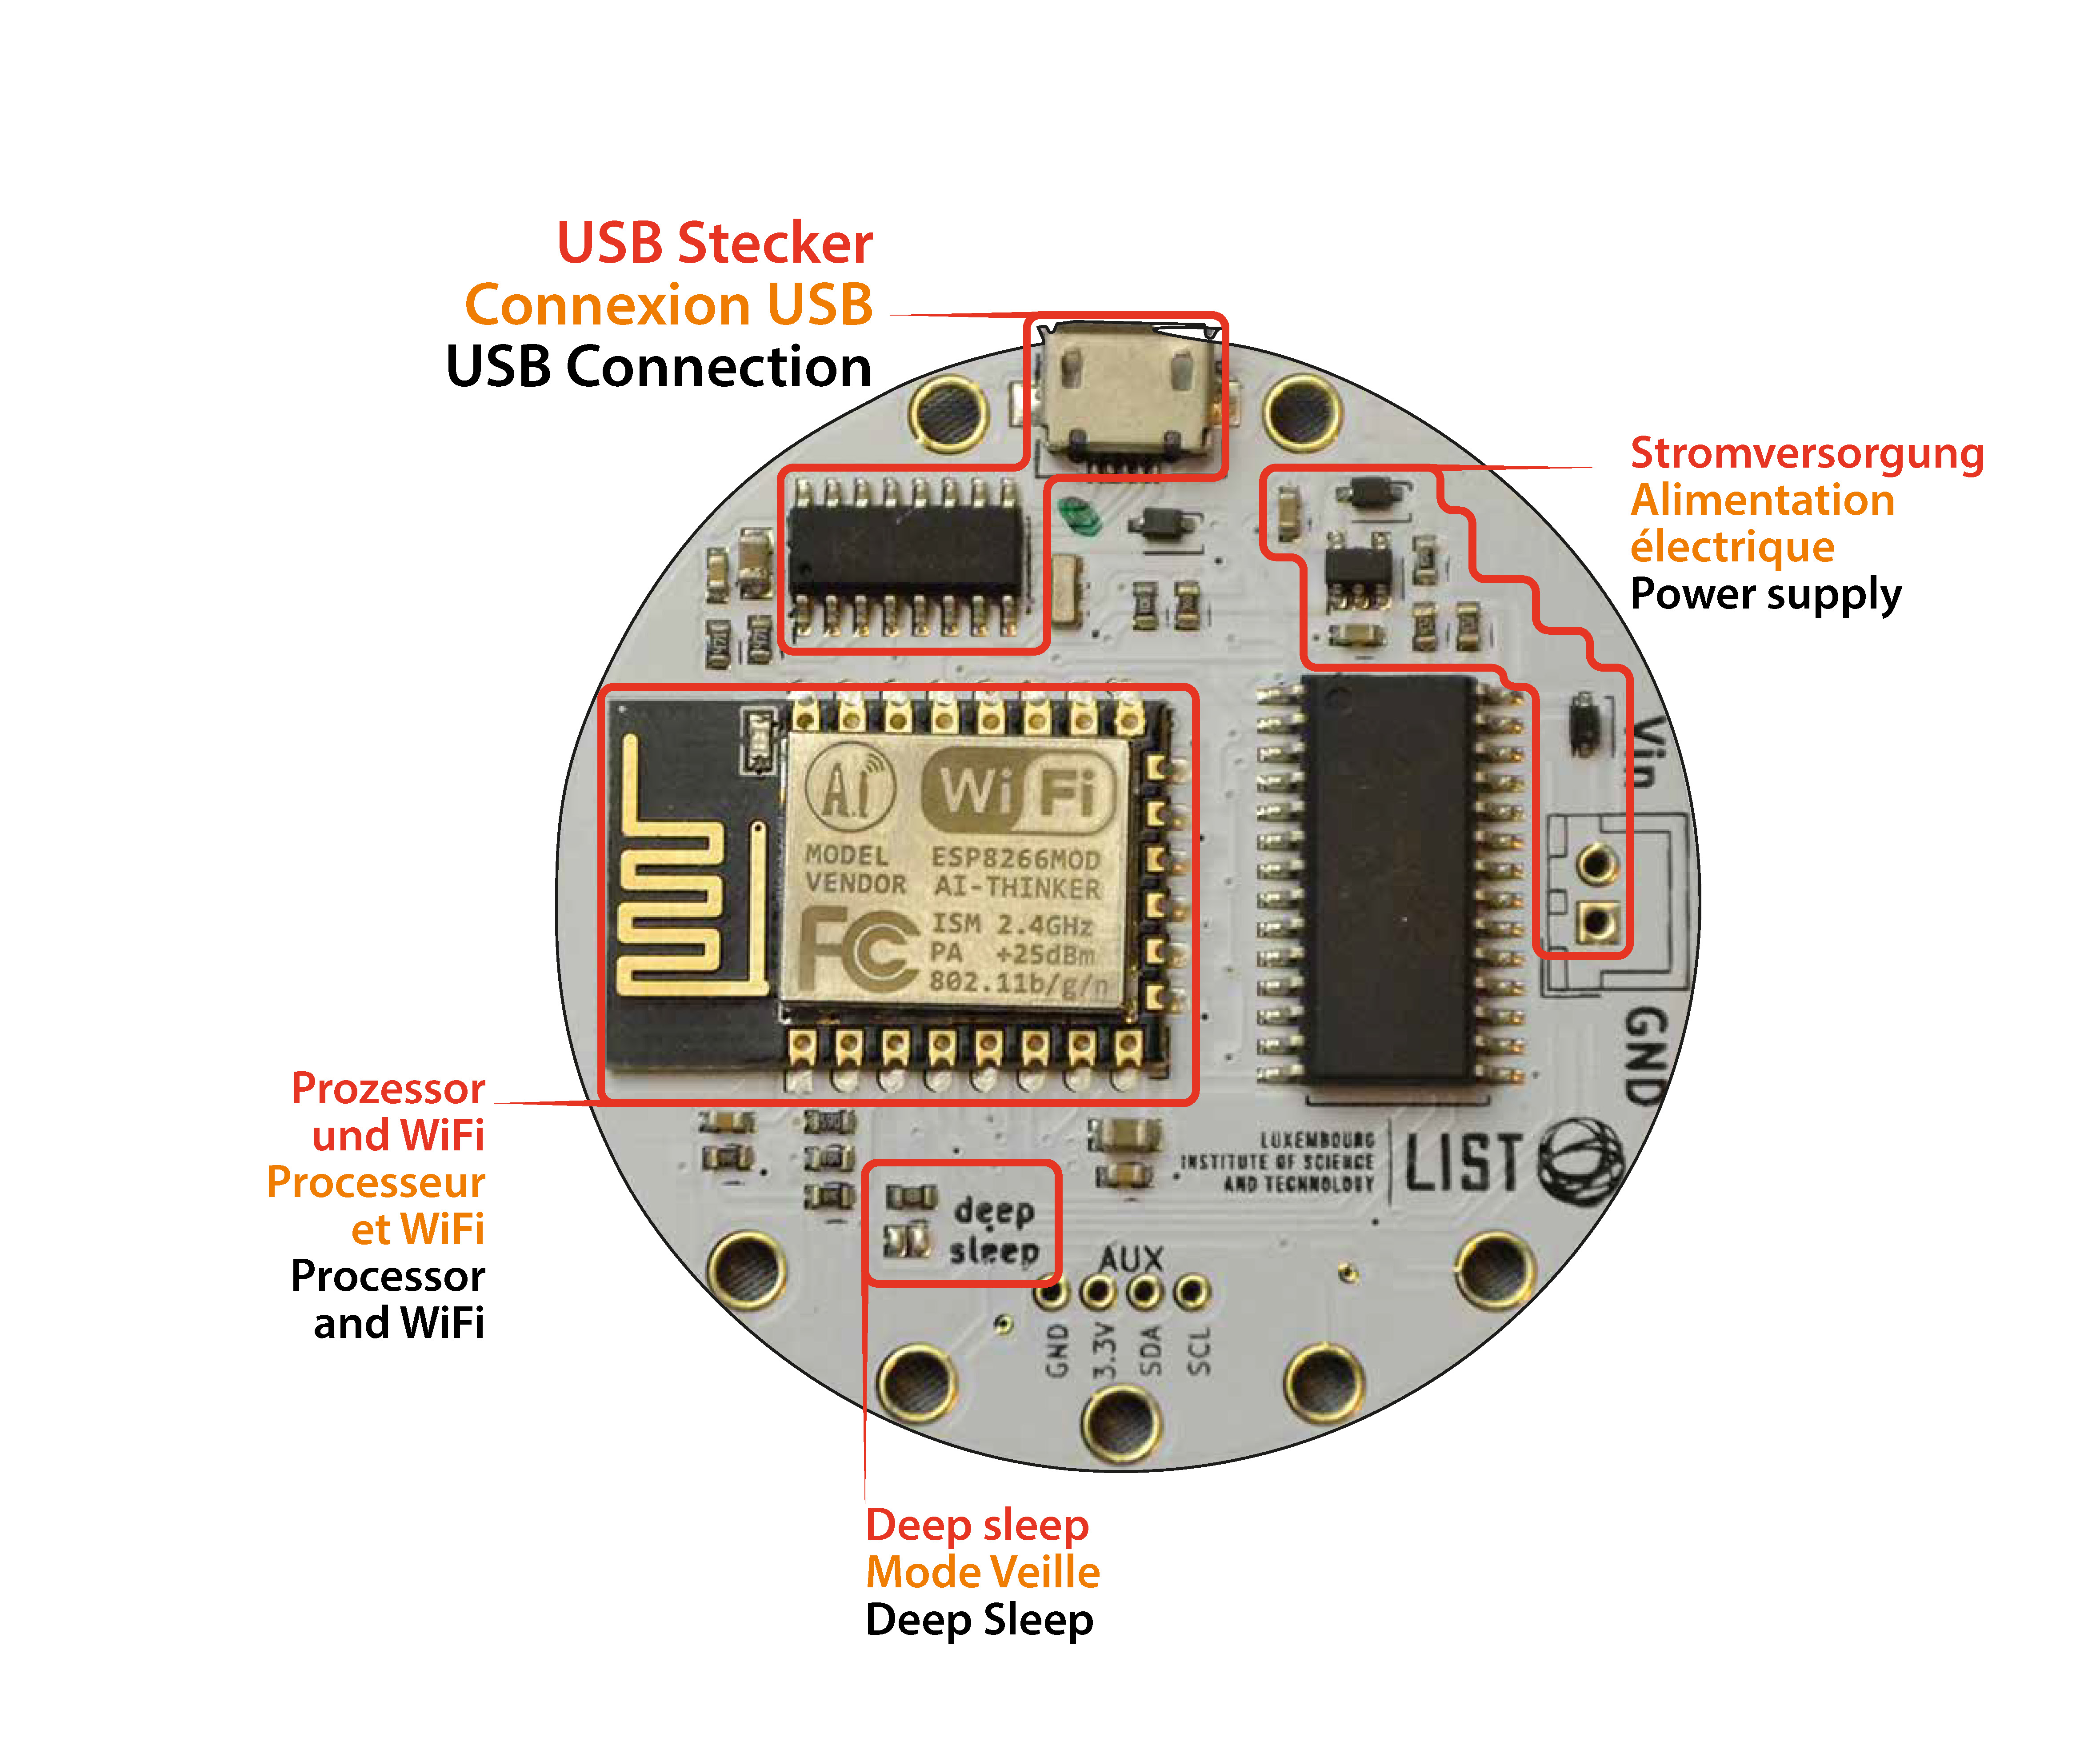
The Kniwwelino Board
The Kniwwelino hardware consists of a 5×5 red LEDs matrix, a RGB LED and two push buttons. There are additional ports that can be used to extend the board by additional LEDs, buttons, sensors and other peripherals. The underlaying micro-controller platform is also embedding WiFi. That enables the Kniwwelino to connect itself to other Kniwwelinos over the Internet. A USB port enables to charge the board by plugging the cable on a computer, or using a charger (like the one used to charge smarpthones) or a power bank.
The programming environment
Online version
You can program your Kniwwelino in different ways. The easiest way to start with is to use our visual programming tool Kniwwelino Blockly, which is available online on http://code.kniwwelino.lu. You can use it from any device with a web browser (e.g. a tablet), your code will be transfered to your Kniwwelino via Wifi.
The visual programing tool allows you to create code by assembling blocks like puzzle pieces.


Downloadable version
Alternatively, to use Kniwwelino Blockly offline, you can download the desktop version. With this version you can transfer the code to your Kniwwelino when attached via USB to your computer.
Arduino IDE
Advanced users can program the Kniwwelino with the Arduino IDE, with the help of our Kniwwelino Arduino Library.
The power source
The Kniwwelino has no battery included. This means that you have to attach it to a power source to bring it to life. There are different possibilities for a power source.

You can either attach it via USB cable to the computer, or you can use a Powerbank, a USB Hub or a Micro USB based charger (as used for many mobile phones).


As a more advanced user, you can also attach a Battery holder with 3 AAA or 3 AA batteries.
As soon as you connect your Kniwwelino to such a power source, the RGB LED will start flashing, then all matrix LEDs will light up, and progressively switch off until the Kniwwelino has entirely booted (usually this will take a few seconds). During this time the Kniwwelino will try to connect to one of the WiFi Access Points it has been configured to previously.
As soon as it is connected (or after a timeout, in case it cannot connect), the program which has last been transferred to the Kniwwelino will start.