Adding external buttons
External buttons are buttons which can be connected to the Kniwwelino in addition to the buttons A and B already available on the board. Similarily as for the LEDs (cf. Adding external LEDs), those are connected through the pins on the outer area.
To work with external buttons, you need additional material: the buttons, as well as wire to create a closed circuit using the pins of the Kniwwelino.
With the Kniwwelino Blocks, you can then detect when current is flowing, i.e. when the button is pressed.
Connecting external buttons is very similar to connecting external LEDs: you can use either alligator clips or wire.
Connecting external buttons with alligator clips
You need:
- Buttons
- Alligator clips in black and one other color
To connect the button:
- Take a black alligator clip and attach it to the GND pin at the top.
- The other side of the black clip goes to one of the legs of the button.
- Take a second alligator clip, and connect it to the leg next to the one connected with the black clip.
- The other side goes to one of the pins at the bottom, labeled D5, D6, or D7.
In the following image we connected it to the D5 pin with a yellow alligator clip.
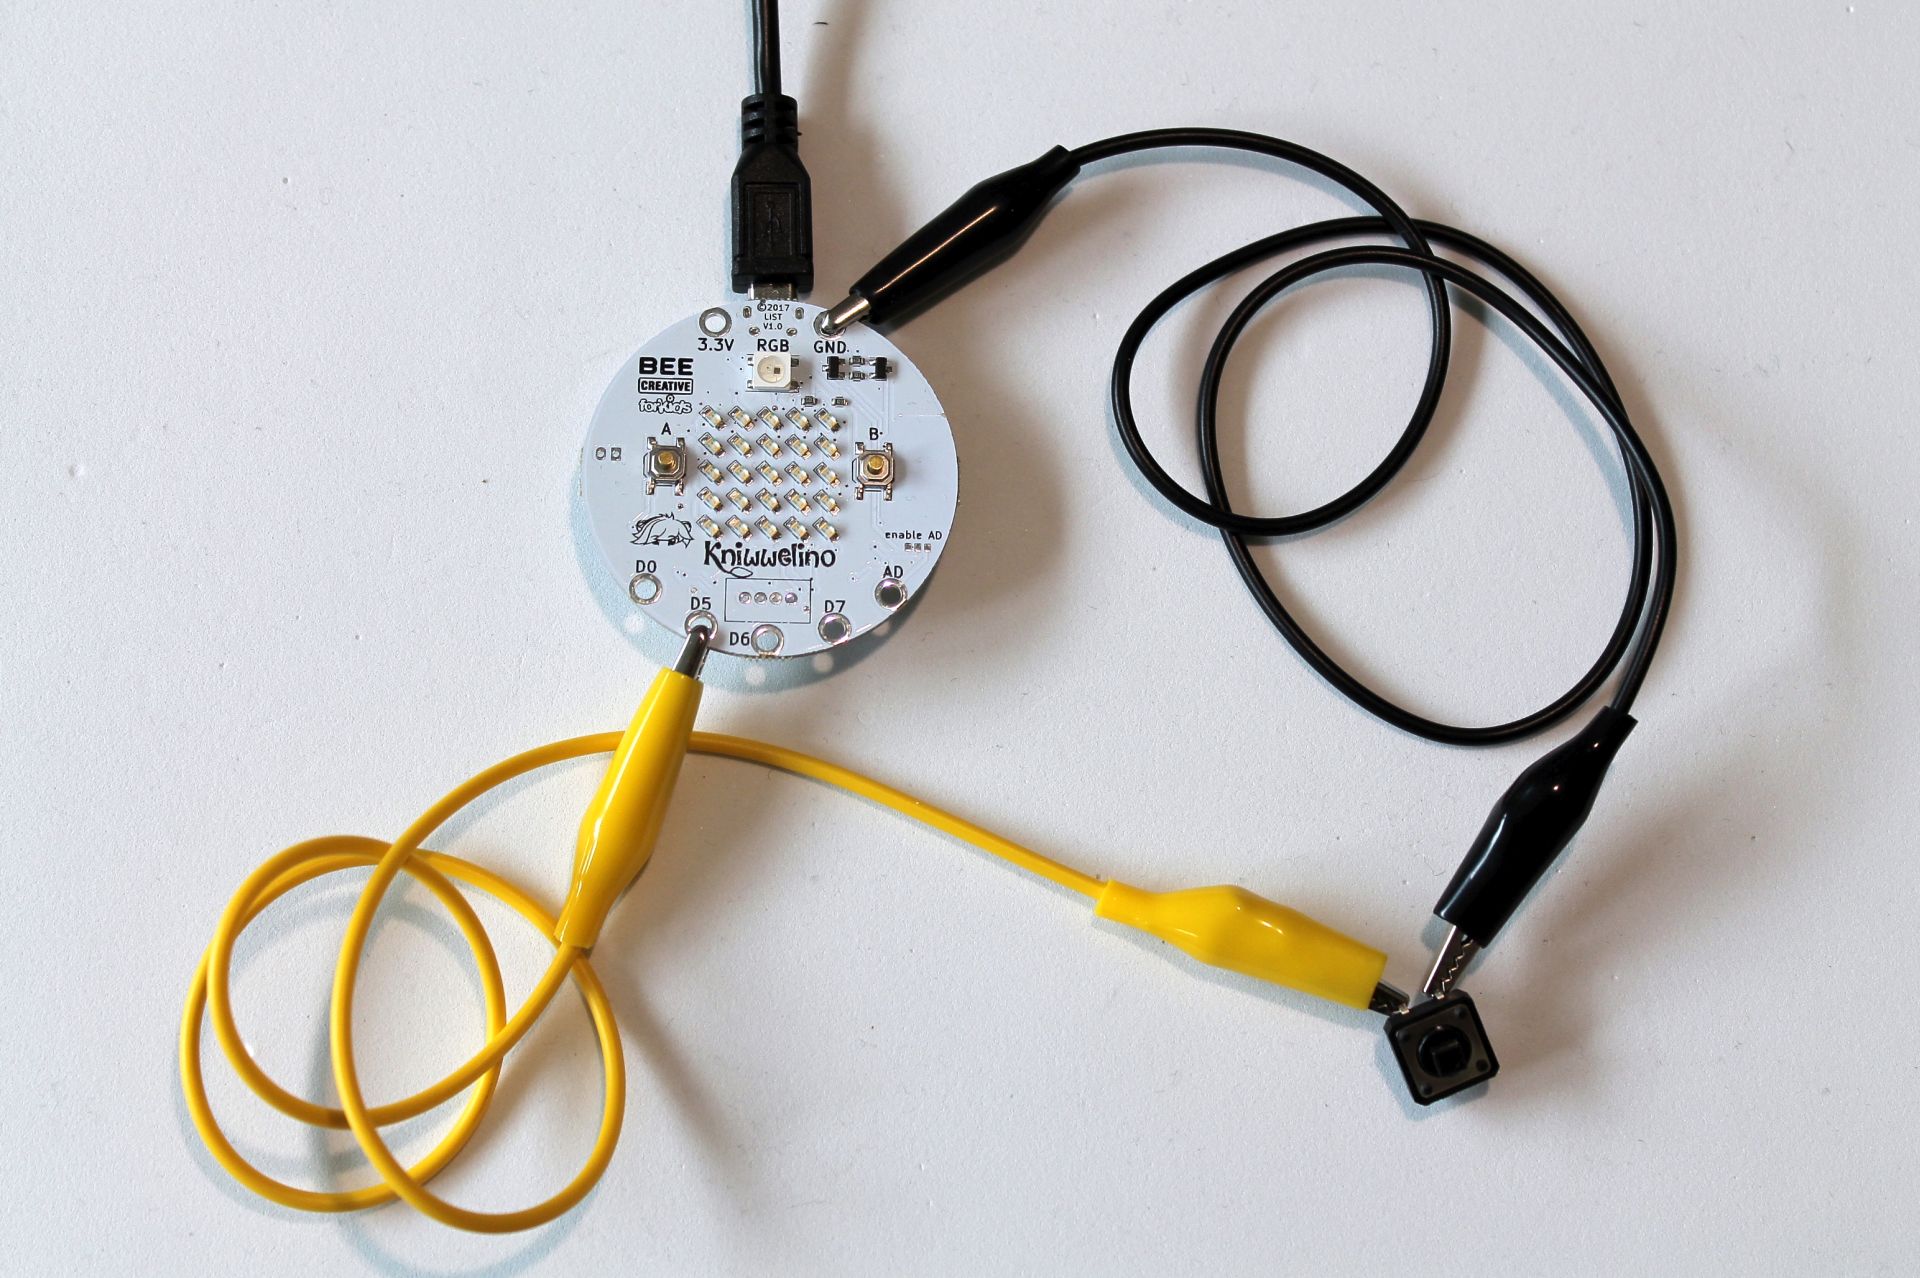
Now your circuit with one external button is closed. You can now program Kniwwelino to detect when current is flowing through this circuit, which will mean that a button was clicked or is pressed.
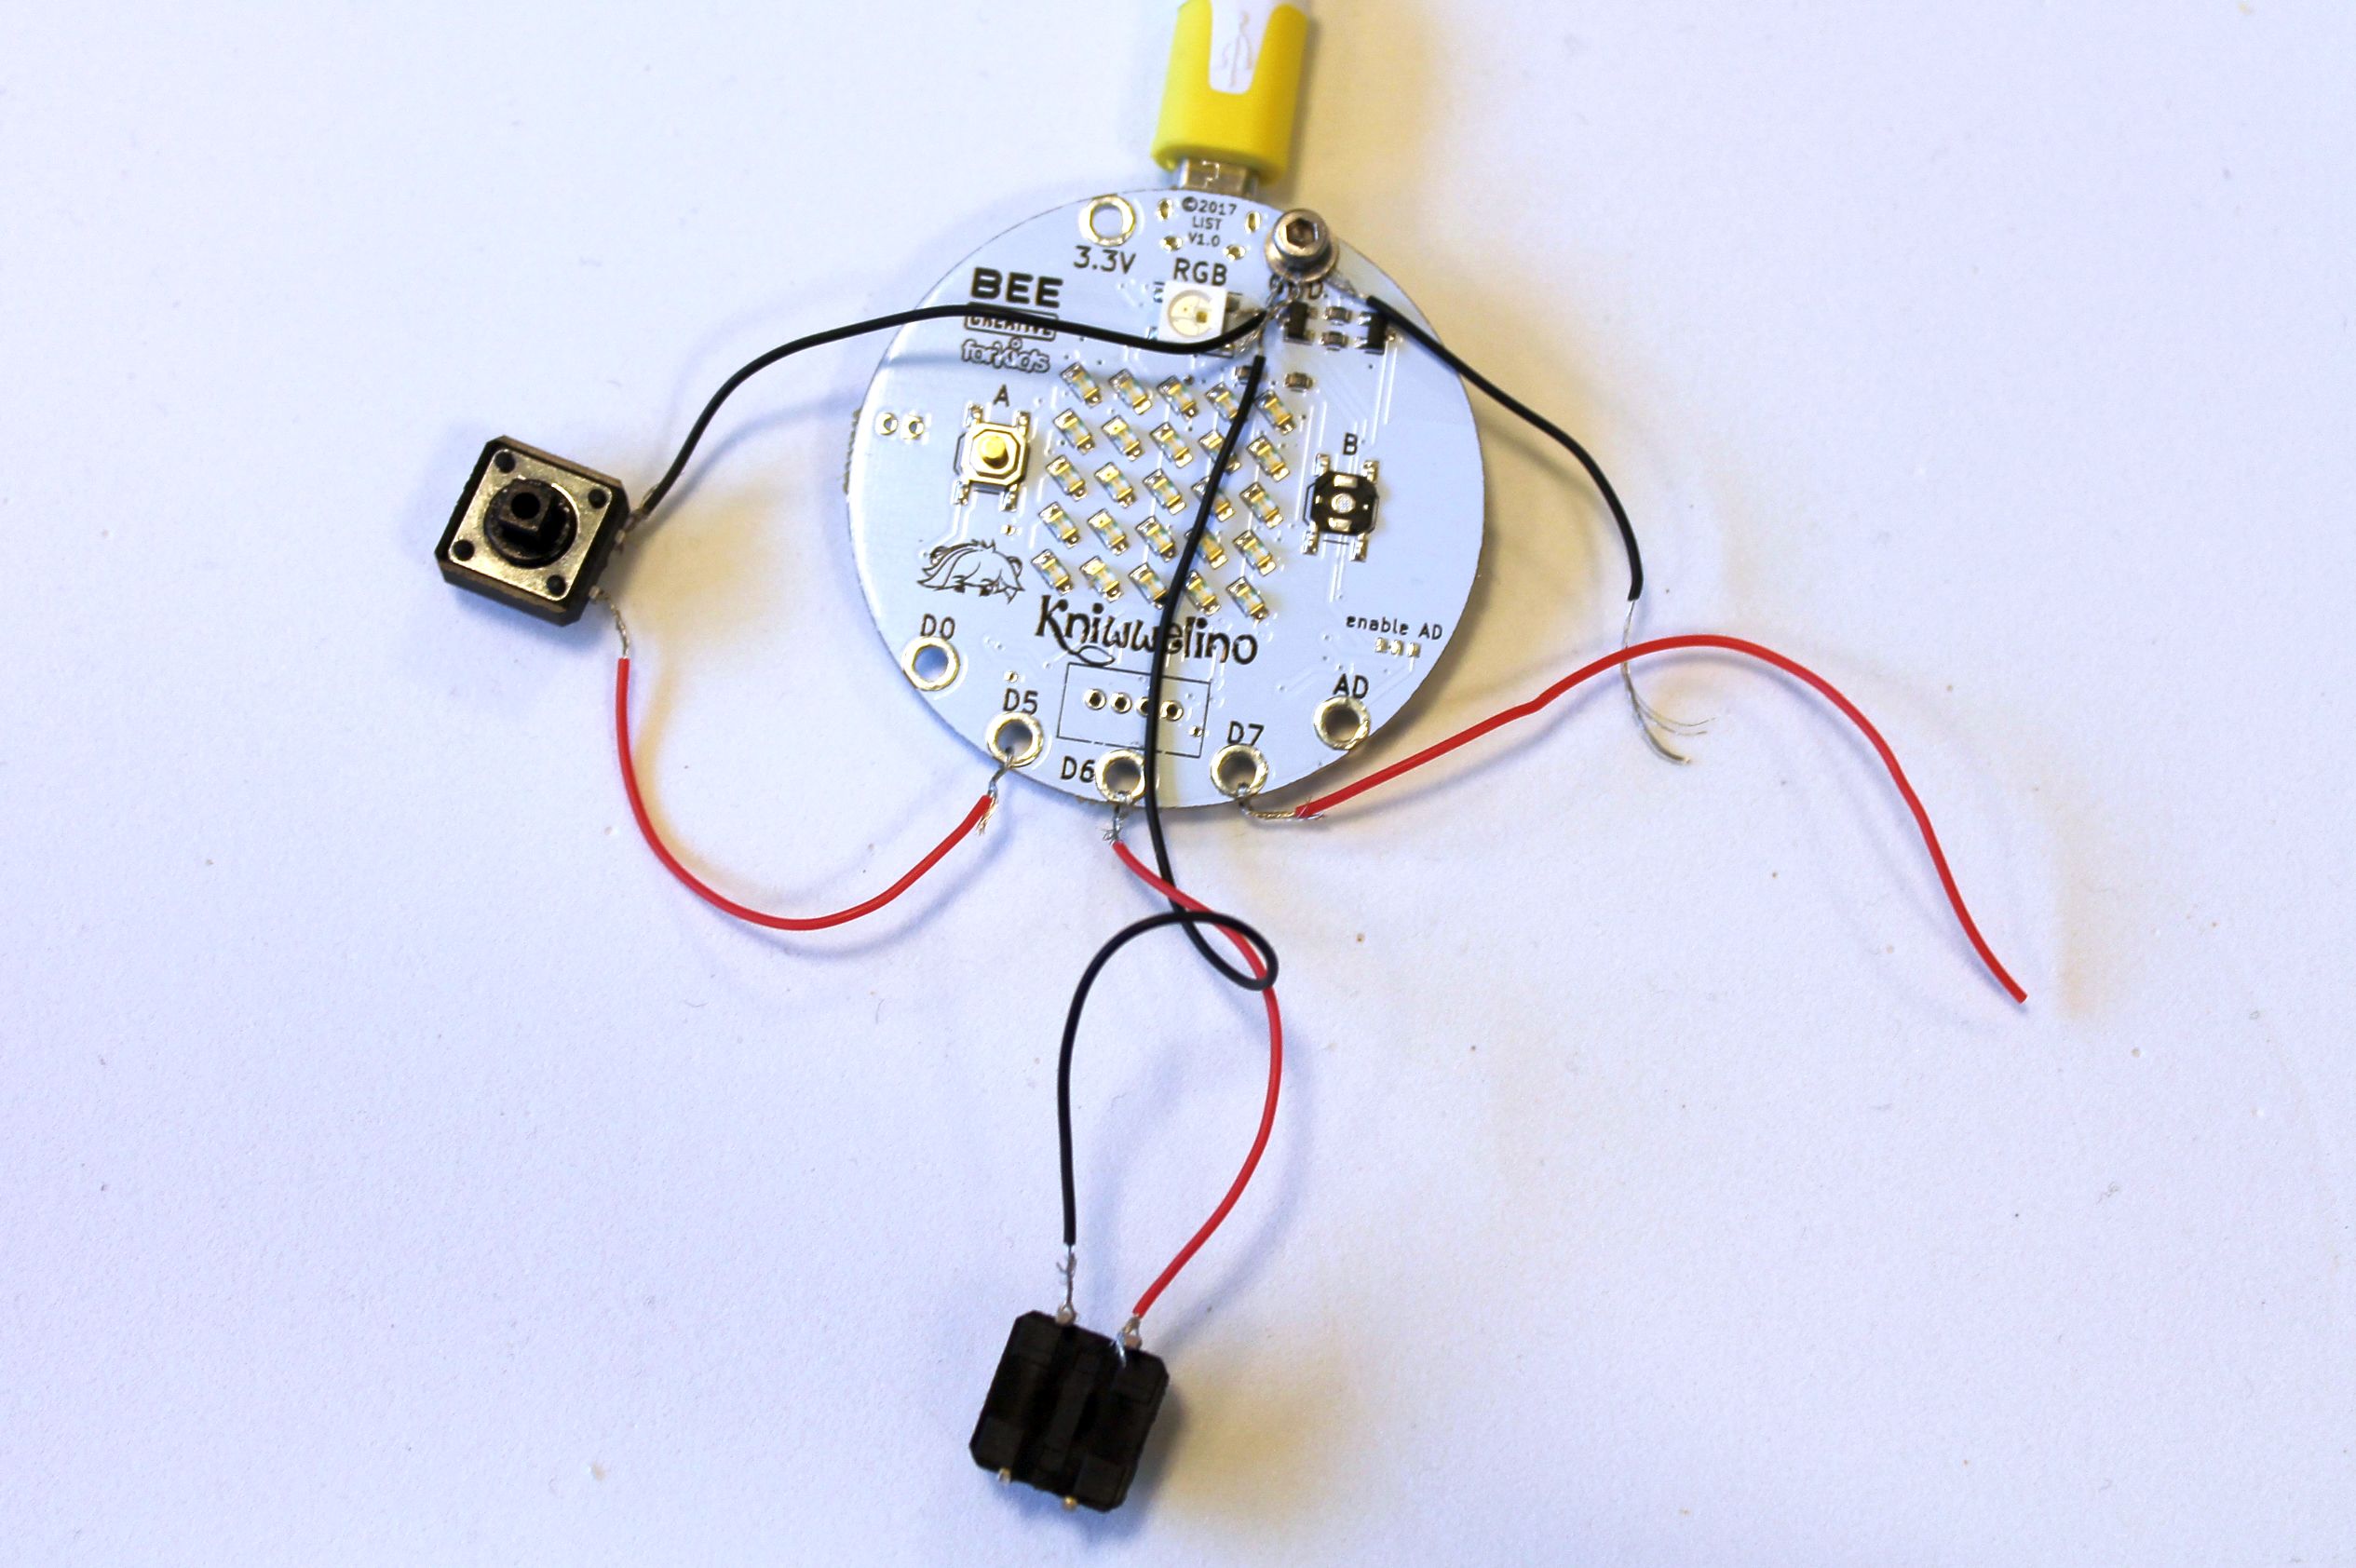
Connecting external buttons with silicon wire
The process for connecting external buttons is very similar to connecting external LEDs. Please refer to section Adding external LEDs if you would like to have step-by-step instructions of how to attach such components.
You need:
- boutons in the color(s) of your choice
- Silicone wire in black and a second color
- Small screws M2 or M2.5
To connect the button(s):
- Cut a piece of the black and colored silicon wire each (using scissors). The length depends on the project you want to use it for.
- Take off a part of the silicon protection at both ends (about 1 to 1.5cm). You can simply tear it off with your finger nail.
- Wind one end of the black wire around one of the legs of the button.
- Wind one end of the colored wire around the leg next to the previously winded leg of the button.
- Wind the second end of the black wire around one washer.
- Wind the second end of the colored wire around one of the pins D5, D6 or D7 at the bottom of the Kniwwelino.
- Repeat all the above for each of the buttons you want to connect to the Kniwwelino. You can attach up to 3; in this example we used 3 (third button is not yet connected). Each button is connected to a different pin.
- Fix the washers of all the buttons with a screw and a nut on the pin GND.
Programming external buttons
You can program the external buttons with the following blocks, listed underneath Buttons:


Select D5, D6 or D7, depending on which pin you used to attach the button.
Use the block as part of an if - then block to execute blocks when a button was clicked or pressed. For example, this code writes “Hello Kniwwelino” on the matrix when an external button on pin D5 was clicked:
